How to make QR Code Labels: A Complete Guide
You want to create QR Code labels in large numbers. This may be for use cases such as—inventory management, product packaging, providing information at tourist sites, or making employee business cards.
In this article, we will give you two ways on how you can create QR Code labels.
Keep reading.
Way 1: Create QR Code Labels in MS Word Document on a Windows PC
To create QR Code labels in MS Word Document on a Windows PC, here are the steps you need to follow:
1. Save QR Code images in a folder
The first step is to save all your QR Code images (that you wish to add into MS Word) in a folder in one of your drives in your Windows PC.
If you do not have QR Codes generated, you can get them generated via Scanova’s Bulk QR Code Generation Service.
2. Create an Excel Sheet i.e. the Data Source
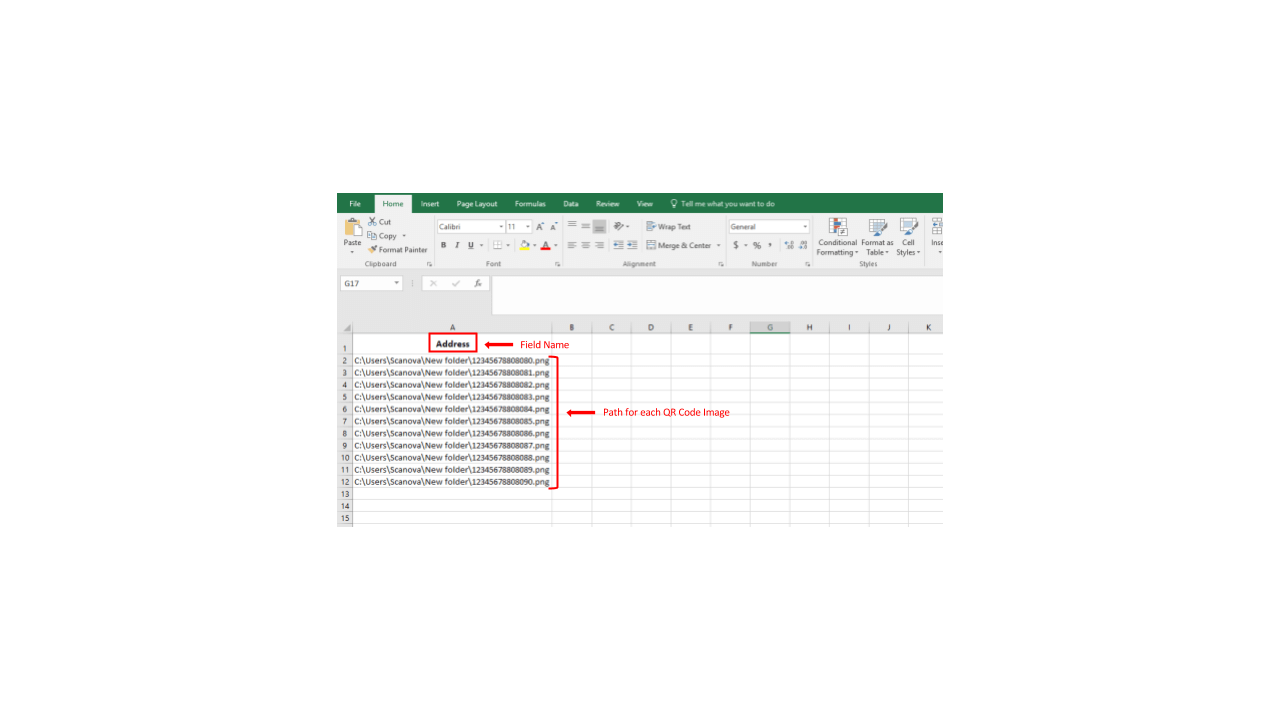
a. Create a new MS Excel. In a sheet of this Excel, in Column A, specify the file paths to each QR Code image saved in the folder (Step 1). One path in each row.
b. In this sheet, Column A needs to have a ‘field label’ in Row 1. This will be used as a reference in the Mail-Merge process in the subsequent steps. In the example shown below, we have named the ‘field label’ as ‘Address’.
c. Create and save this spreadsheet for later use
3. Create a Labels Template in MS Word using Mail Merge
a. Create a blank MS Word file
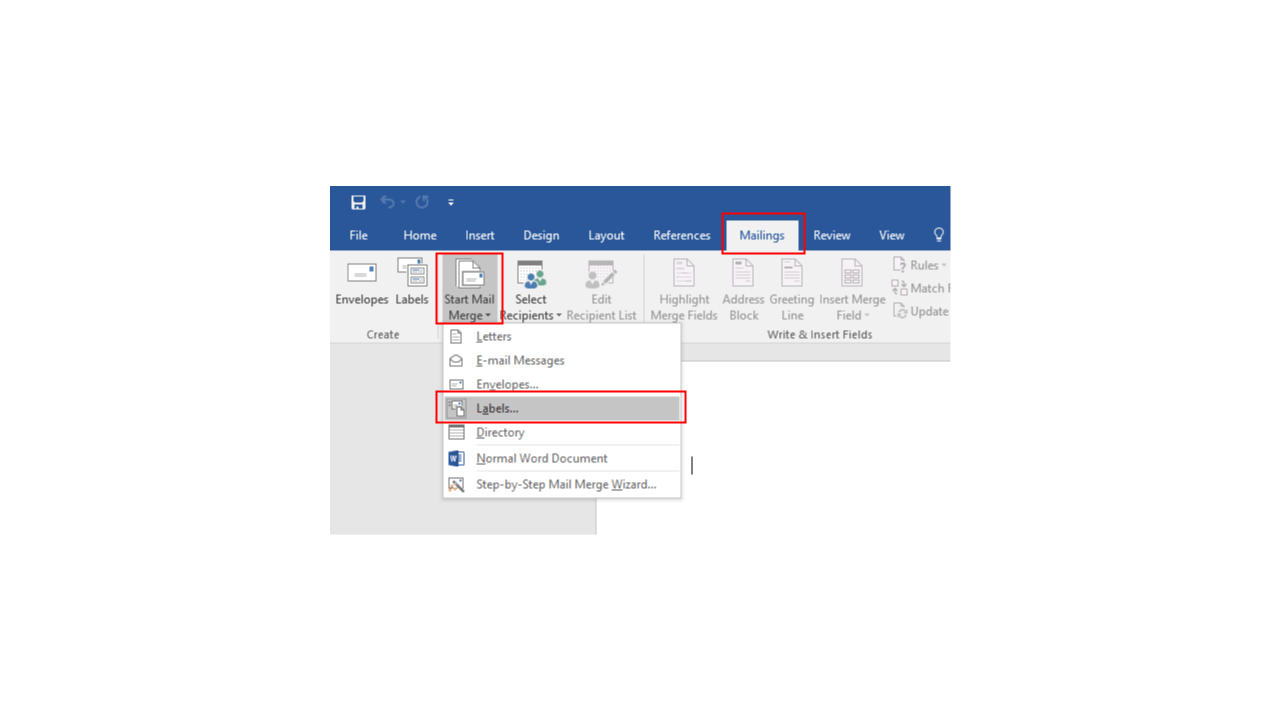
b. Click on the Mailings tab in the top navigation bar
c. Click on Start Mail Merge drop-down and click on Labels
d. A window Label Options will open. In the Label Information section, choose the label vendor from the Label Vendors drop-down menu (e.g. Avery US Letter)
e. Next, choose the exact product from the Product Number list that you will be using to print the labels (e.g. we have selected Avery 22805 Print-to-the-Edge Square Labels)
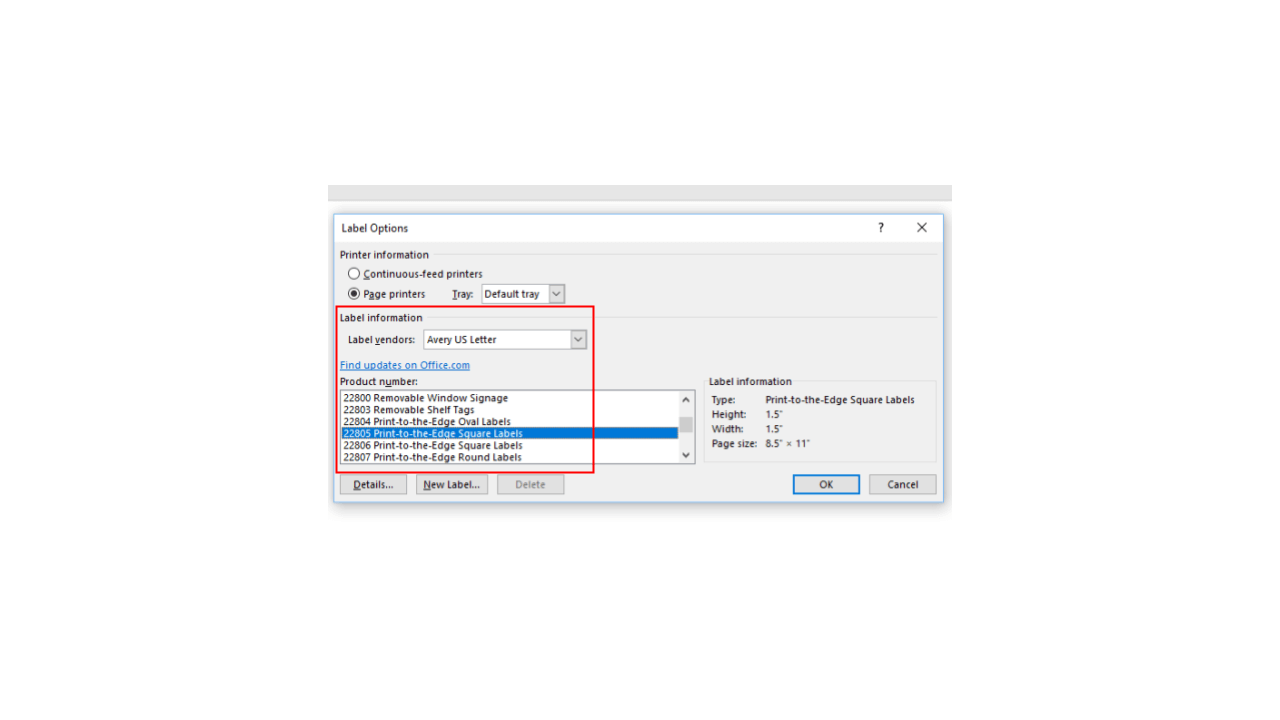
f. Click on OK when the selection has been made
g. Click on Select Recipients in the toolbar ribbon under Mailings and then click on Use Existing List. Navigate to the Excel data source file created in Step 2
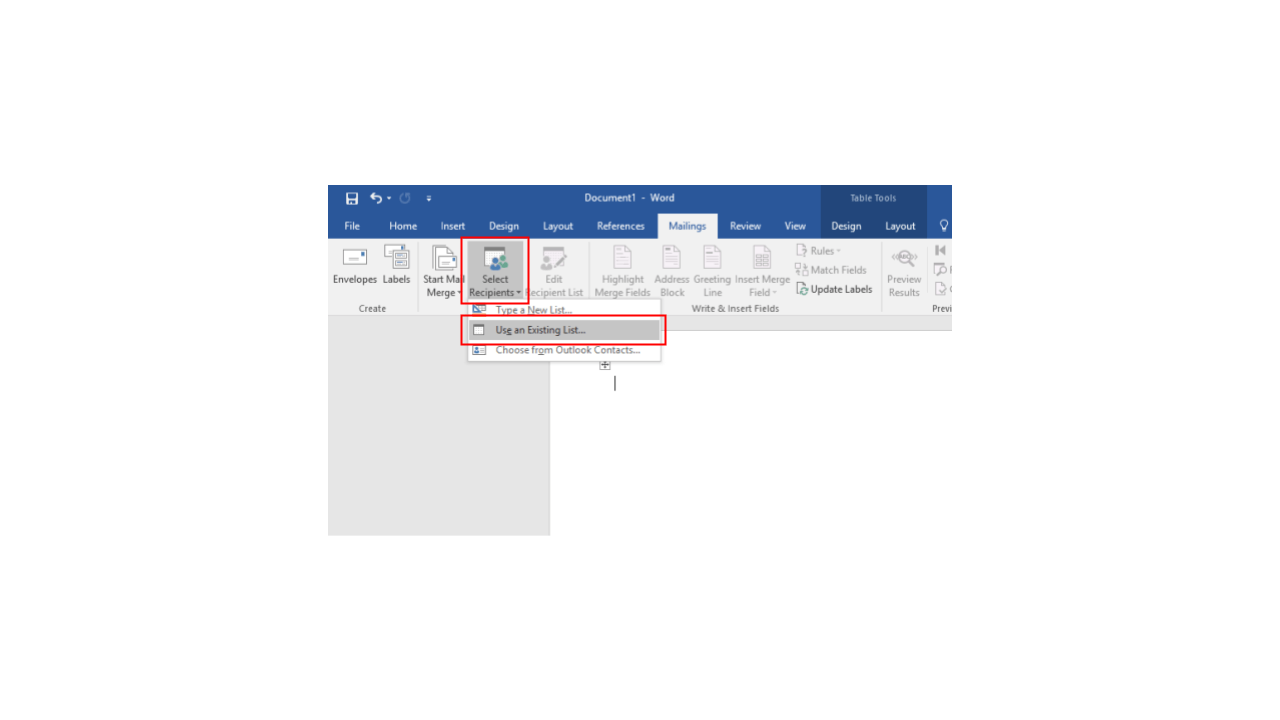
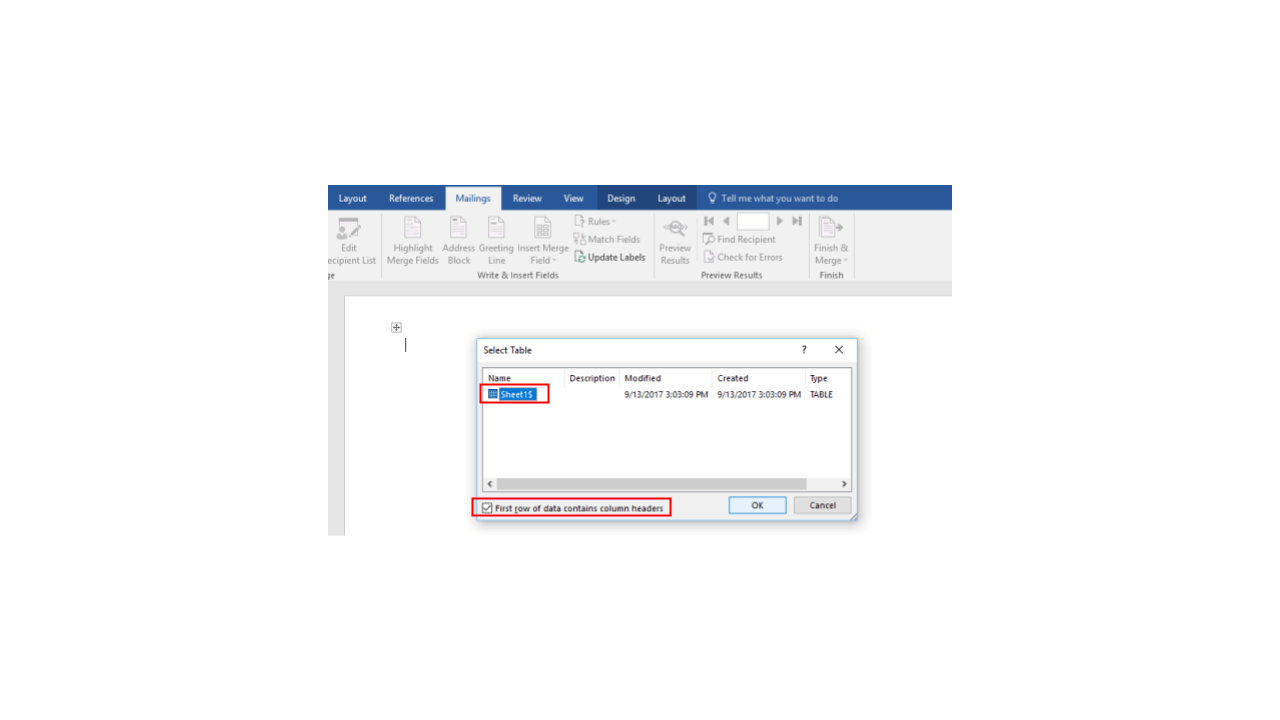
h. A dialog window will open. In this window, select Sheet1 and check First row of data contains column headers. Then click on OK.
i. In the document, you will now notice placeholders for your labels
j. You’ll have to position the cursor in the first label cell
These instructions need to be followed:
- Press CTRL + F9 to open curly brackets, type INCLUDEPICTURE and then a space
- Next, press CTRL + F9 again, type IF TRUE and then a space
- Press CTRL + F9 again, type MERGEFIELD and then the name of the ‘field label’ you added in the Excel spreadsheet created in Step 2b
- Position the cursor just before the last nested curly bracket and type \d
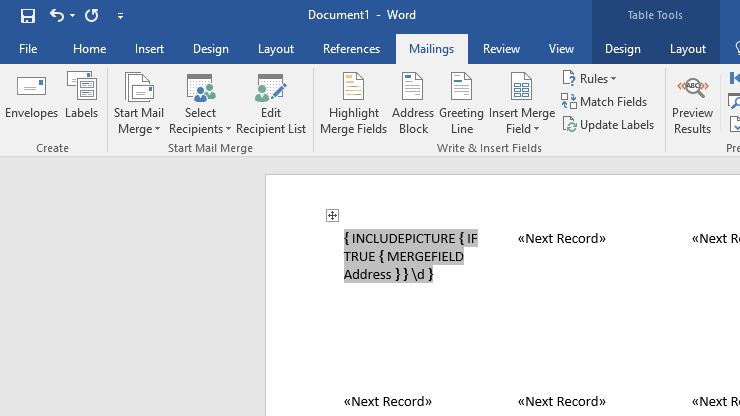
- After completing these steps you should have ended up with the following in the first cell:
{INCLUDEPICTURE {IF TRUE {MERGEFIELD Address}} \d}
Tip: In some Windows 10 systems, CTRL + F9 initiates the Window’s Search application. In such cases, use CTRL + Fn + F9
k. Click Update Labels. It will populate all label cells with QR Code images stored in the folder. Also, the QR Codes will be arranged in the document as per their arrangement in the folder
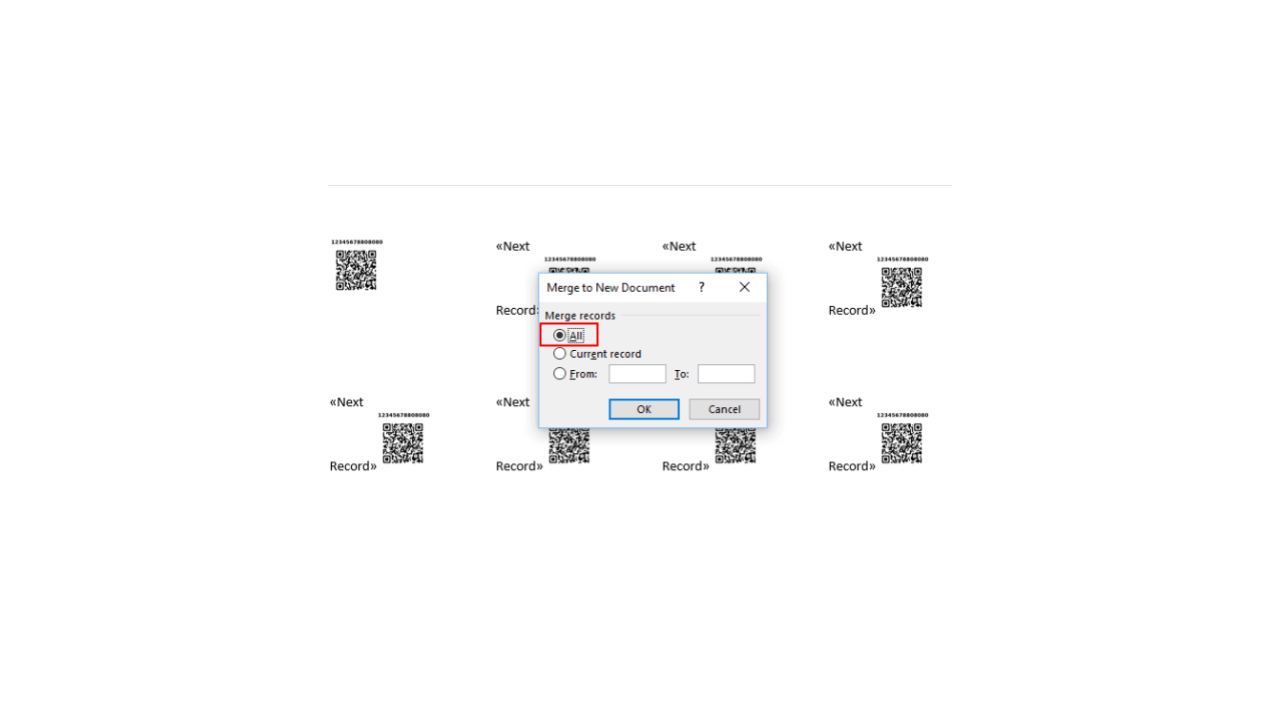
l. Click on Finish & Merge and select Edit Individual Documents
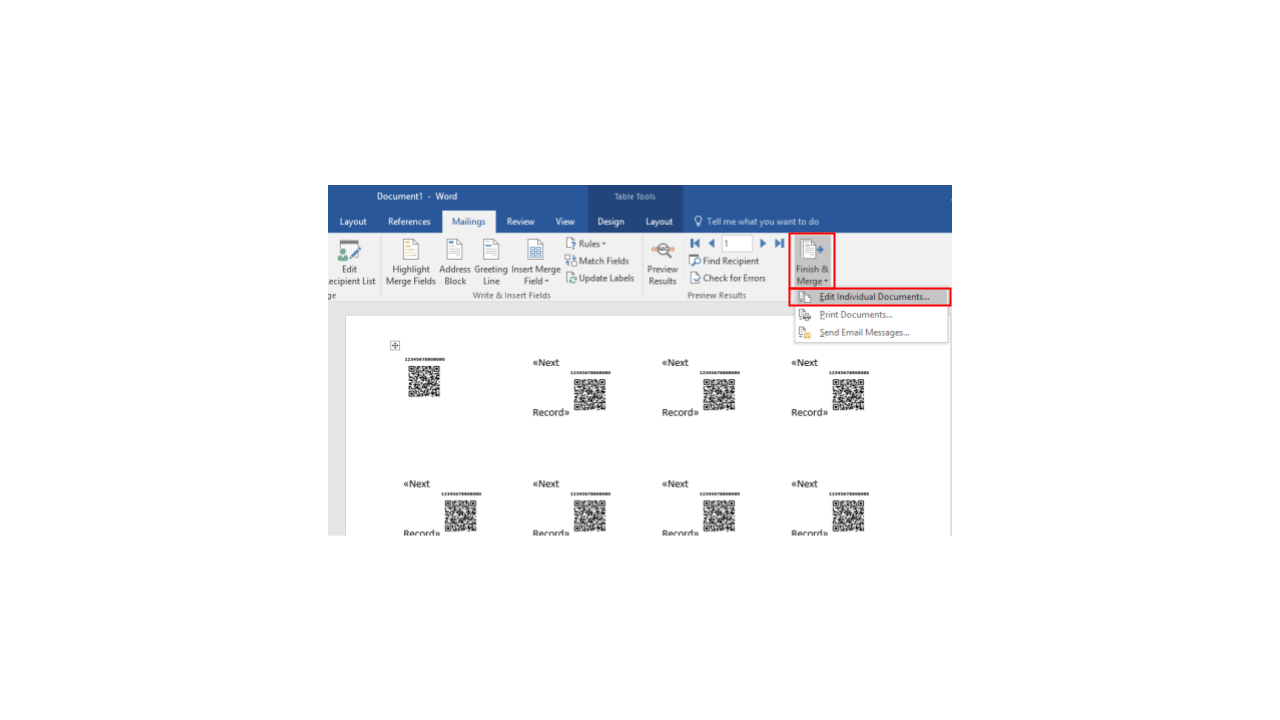
m. A window Merge to New Document will open. In this window, select All under Merge Records and click OK. This will run the script in each label cell and hence, replace the actual script with the QR Code image referenced in it
n.A new MS Word document will open. As a result, you’ll see a list having each QR Code in its own label cell

0.We recommend you to save this document as a PDF and use this PDF to print the labels.
Way 2: Create printable QR Code labels PDF
You can create PDFs of printable QR Code labels using Best QR Code generator tool such as QR Batch.
Using QR Batch, you can:
- Specify the QR Code size, which means the labels you want per sheet. This can range from 1-80 labels per sheet.
- Select from a list of ten standard labels layouts—1, 4, 6, 9, 12, 20, 48, and 80 QR Code labels per sheet—compatible with Avery sheets
You can choose the size that is suitable to you. And download print-ready label in PDF document.
For more information, you can refer to this detailed guide on QR Code labels.
So, you can choose either of the two ways to create QR Code labels for your use case.
{ “@context”: “http://schema.org”, “@type”: “VideoObject”, “name”: “QR Code Label: Creating Labels Made Easier”, “description”: “Hey Everyone, In this video, you’ll learn how to create QR Codes as Labels. 00:00 – Introduction 01:29 – A Step-by-Step Guide But did you know that you can also export these QR Codes as labels? Yes, in cases such as inventory management where you need to create QR Code labels, you have to do two things. First, you have to create QR Codes. Second, you have to arrange them as labels using Microsoft’s mail merge feature. Simply use a bulk QR Code generator that allows you to create and export QR Codes as labels. In this video, we have explained how to do it. If you have any queries, ask them in the comments. If you find the video helpful, hit the like button, and don’t forget to subscribe to our YouTube channel. Links mentioned in the video: – QR Batch website: http://bit.ly/2lx4i6O – How to create a spreadsheet with data to be encoded in QR Codes: http://bit.ly/2n9uZ24 Other links: How to generate QR Codes in bulk: http://bit.ly/30J4uPB How to scan a QR Code: http://bit.ly/2KXeNso QR Codes & Lables in DXF Format: https://bit.ly/3bMf2Is #qrcodesticker, #qrcodegenerator, #scanova”, “thumbnailUrl”: “https://i.ytimg.com/vi/lswZakAeNiw/default.jpg”, “uploadDate”: “2019-09-27T08:22:59Z”, “duration”: “PT5M19S”, “embedUrl”: “https://www.youtube.com/embed/lswZakAeNiw”, “interactionCount”: “9476” }