QR Code for Document Verification: Safe and Secure Verification Process

From academic certificates to lab reports, counterfeiting has become a worrisome issue across industries. And given the advancements in softwares such as Photoshop, forgery has become easier.
This can mean a loss of revenue and identity theft for the concerned stakeholders. So how do we stop this? Well, there’s one way you can conveniently do the needful in an effective way—via QR Codes.
QR Codes are 2D barcodes that can store a lot of information. You can scan them via a smartphone or a dedicated app.
These square-shaped barcodes are ubiquitous today. And you might have seen them at the check-out counter in grocery stores for payments or on print media creatives.
These QR Codes can be used extensively for identifying fake documents. In this article, we will show you how QR Codes can help in document verification.
Keep reading to know more.
A. Why use QR Codes for document verification
With QR Codes, you can identify whether any given document is genuine or not. It’s even better if you have your own database or own information system that can help the end users verify the document details. Here is how it works:
You create a QR Code that links to your website or database containing all the details of the required documents. These may include details such as name, document identification number, and license details.
Generate a QR Code For Your Unique Case
START TODAY!
When the end-users scan the QR Code on the physical document, they will be able to see all the details on the phone. These details can then be matched with those on the printed document.
Since the details will be hosted on your information system, none will be able to tamper with them.
B. Popular use cases of QR Codes for document verification
Here are some ways you can use QR Codes to prevent forgery:
1. Certificate authentication
You would have come across some duplicated certificates (academic degrees or even licenses). And it is tough to spot the difference between an authentic and a forged copy with a mere look.
But QR Codes are up for the game. How? If you issue certificates to your students, customers, or any other stakeholders, just add a QR Code to them. Now this QR Code would be linked to all the details on the document on your own website or database.
As people scan it, they will be able to see all these details on the web link. In addition to the details, this QR Code may also show the status of the document such as Valid or Invalid. It’ll help easily verify the document’s authenticity without having to match every detail in the database manually.
2. Laboratory reports
Laboratories issue health certificates throughout the day. And since the pandemic, report authenticity verification has become important to curb disease spread.
Now just like the use case mentioned above, QR Codes can offer an effective way of verification here.
C. How to create a QR Code
Now you’ve why it makes sense to use QR Codes for document verification. The next question—how to create one?
Well, you can either create them one by one or by integrating QR Code generation with your information database.
To help you understand it better, here is a brief explanation of both ways:
1. Create QR Code one by one
a. Find a QR Code generator
Since you want to direct people to a website that allows them to verify the authenticity of your documents, you need to select a Website URL QR Code.
And you’d need a QR Code generator that allows you to create it. You can head on to any search engine and look for a solution provider. It’ll get you many options to choose from.
But going through all the search results to find the best one is a tedious process. For your convenience, here is a detailed comparison of the best QR Code generator available online. This will help you make a sound decision quickly.
Related : QR Code For Link
b. Create a QR Code
Using Scanova, here’s how to create a QR Code for document verification:
1. Go to Scanova and select the Website URL QR Code category
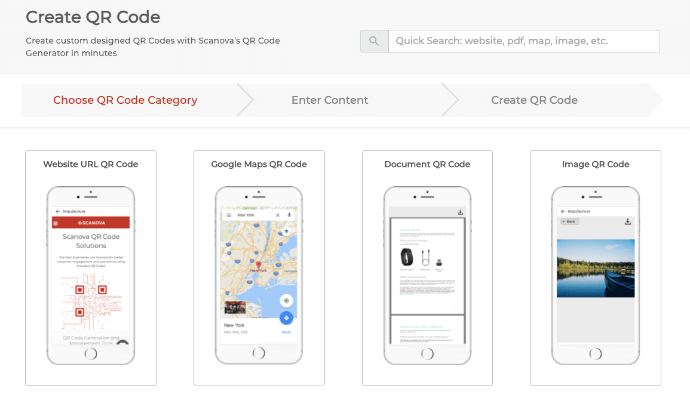
2. Paste the document verification link and click Continue
3. Now you’ll be asked to name the QR Code. Once you’ve named it, click Create QR Code
4. On the page that loads, you’ll see the image of the QR Code. Alongside it, you’ll see the Edit Design button. If you click on it, you’ll see two design options—Custom Logo Design and Custom Background Design
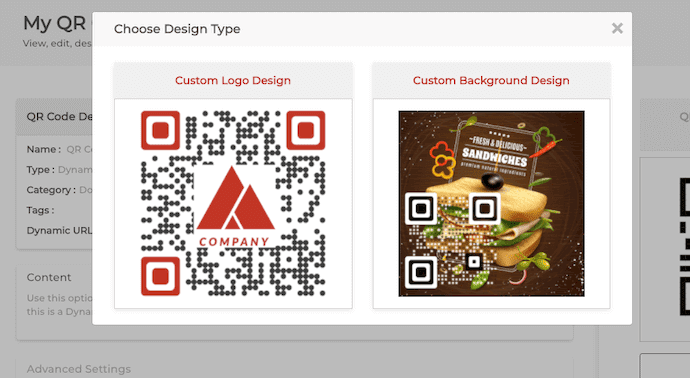
Custom Logo Design: It allows you to add your business’s logo and color to the QR Code.
Custom Background Design: It helps you superimpose your QR Code on any image.
5. Once you’ve decided on design or no design, click Download. You’ll be prompted to sign-up for a 14-day free trial. Note that you won’t have to enter your card details to sign up
6. Once you’ve signed up, click on Download. You’ll then have to specify the QR Code image’s format and size
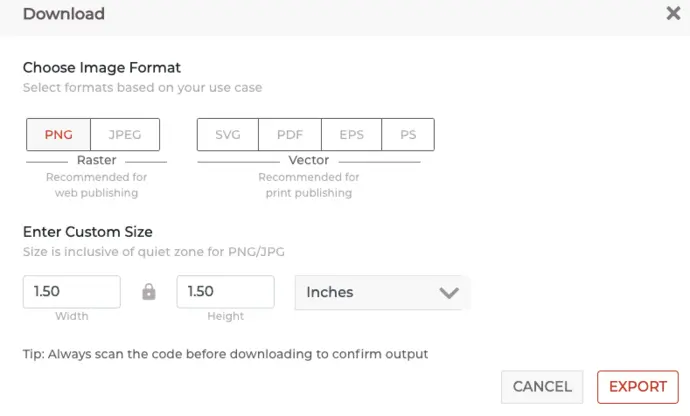
7. Once you’ve specified the details, click Export
That’s it. Your QR Code will be downloaded. It is always advisable to test scan the QR Code before putting them out.
2. Create QR Codes programmatically
If document details are stored in your database, you can directly integrate QR Code generation into it.
That’s right. You can integrate QR Code generation into your own information system with QR API. It allows you to generate QR Codes programmatically in real-time.
Hence, there is no manual intervention required to create the QR Codes.
Using Scanova’s QR API, here’s how you can proceed:
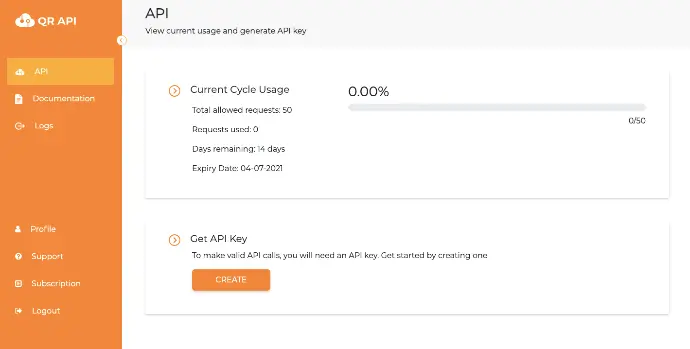
a. Go to QR API and sign-up for the free trial
b. Now, you’ll see your cycle usage with the option Get API Key. Click on Create and you’ll then be able to see your API Key
c. Copy the API key and click on Documentation on the dashboard
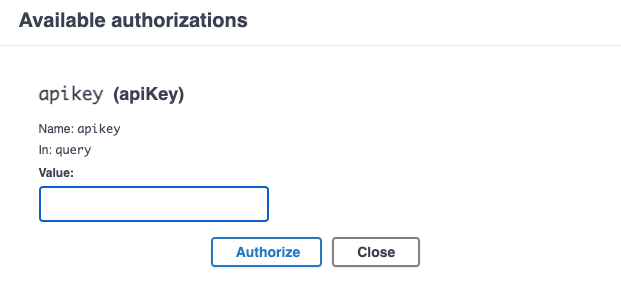
d. As you scroll down, you’ll see the Authorize button
e. Click on the Authorize button. A window will open prompting you to paste the API key in the value box. Once you’ve pasted it, click Authorize
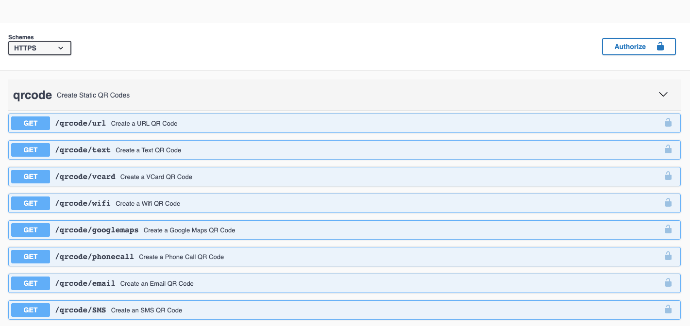
f. Select the Website URL QR Code category and click on the Test button
g. Add the links that redirect end-users to particular document verification links. You can also start customizing the QR Code here
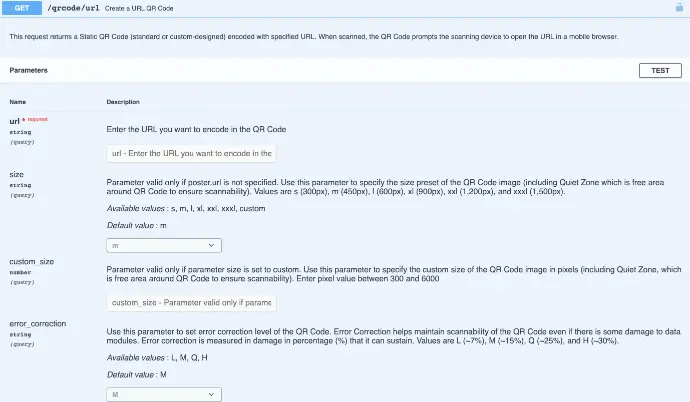
h. Next, specify the level of error correction and other design parameters
i. Once you’ve finalized all the parameters, click on Execute
j. Here, you’ll see Curl, Request URL, and Response Body along with the image of a QR Code containing the encoded content
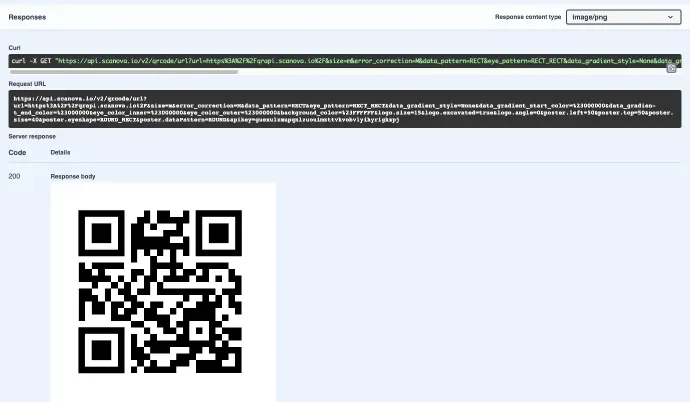
k. Now copy the Request URL and integrate it into your information system
Hence, QR Codes will be generated as the number of response URLs are sent to the API system.
3. Use a dedicated tool for document verification
If you want a tool specifically to add QR Codes to documents for verification purposes, QR Mark is what you’re looking for. It’s built to help businesses and institutions secure their files against forgery.
Here’s how it works:
a. Sign up: Create a free account to get started.
b. Brand your verification page: Add your own domain (like verify.yourcompany.com) so recipients always see your official name when they scan.
c. Upload your document: Add reports, certificates, or any PDF you want to protect.
d. Embed the QR Code: Choose whether to place it on the first page or across all pages. You can even adjust its size and position for best visibility.
e. Integrate with Office & Google: If you prefer, you can install the QR Mark add-in from Microsoft AppSource or the add-on from the Google Workspace Marketplace. This lets you embed secure QR Codes directly in Word, Excel, PowerPoint, Docs, Sheets, or Slides.
Once the document is ready, simply export and share it. Anyone scanning the QR Code will be able to verify details like the issuer, date, and authenticity on a secure landing page without any extra effort required.
Now you know everything you about how QR Code can be used for document verification. You can create your own QR Code and offer a safe and secure verification process to your audience.
Generate a QR Code For Your Unique Case
START TODAY!
