
You have created an excel spreadsheet. This could be for various purposes such as budget planning, record-keeping, and presenting your company’s financial reports.
And you want to share this spreadsheet report with others. It could be with your colleagues, boss, or clients. So you want to find an easy, effective, and scalable way to do it.
There are many ways to do it:
1. By sharing it via email
Email is one of the best ways to share the excel file with your audience. You simply need to fill their email address and attach the file.
It’s an easy task if the numbers are limited. But what if the number of people you want to share the file with is large? This might be at a conference or a seminar.
In such cases, typing the email address of each recipient to send them the file is a tedious task. In fact, many a time, you might not even have the emails of all of them. What would you then do?
2. By handing out printed copies
Handing out printed copies is another way to share the excel file. But the problem is—in case the excel file has many rows and columns, printing it will be difficult.
What you can rather do here is—create a Google Sheet and add its sharable link to the print media creatives.
Or in case you have created an MS-Excel file, you can upload it to a cloud storage site such as Google Drive, Dropbox, and Amazon S3. Then, copy its sharable link and print it.
But there are two problems. First, you will have to print sufficient copies. Under-printing them will cause a shortage in the number of copies. And over-printing will not only cause unnecessary paper wastage but also incur costs.
Second, printing a link will need people to put effort. They will have to pull out their phones and open the browser to type the link. And finally, access the file.
Since it is an effort-intensive process, not many people will bother doing it.
This is where a QR Code comes into the picture. A QR Code is a square-shaped barcode that stores information. And it does not store only limited information but can store a lot of it such as text, numbers, website links, and also an excel file. And we call it—a QR Code for Excel file.
B. QR Code for Excel file
As the name implies, an Excel QR Code stores an excel file. Hence, when end-users scan it, it shows the encoded file to the end-users. And even helps them download it depending on the device’s OS.

Hence, you can convert your excel file to a QR Code. And add it to print. For example documents, presentation, and posters.
Also, whenever you put up a QR Code somewhere, remember adding an appropriate instruction statement (also called CTA).
It could be anything such as Scan here to get the spreadsheet on your phone. This way, people will know what they need to do with the QR Code. Or why do they need to even take action in the first place?

Now that you know what an Excel QR Code is, the next question is—how to create one?
Well, to do that you will need a QR Code generator. Or we can say—the best-suited QR Code generator for your use case. And you can find one easily online.
You might wonder—there are too many of them on the internet. Which one should I go ahead with? Comparing them all will take a lot of time and effort.
Don’t worry. We have a detailed comparison chart where we have compared the best QR Code generator available online. You can examine it to pick up the best one for your use case.
C. How to create QR Code for Excel file
In one of our articles, we’ve discussed how you can convert a PowerPoint Presentation to a QR Code. We need to follow a similar procedure to create a QR Code for an Excel file.
Once you decide on a QR Code generator, you can go ahead to create the QR Code. Using Scanova for a demo, here’s a step-by-step guide on how to do it:
1. Create an excel spreadsheet
To get started, you need the create the excel file first. Now, there are two ways to create an excel file. The first is by creating an MS-Excel file. And then, uploading it to a cloud storage service such as Dropbox or Google Drive.
Once you do it, copy the sharable link to the file (depending on whom you want to grant the access to).
However, this is a long process. And to make things easier, you can use the second approach.
The second way is to create a Google Spreadsheet. You can add and format all the details to create the file online. And once you’re done, you can go ahead to copy the sharable link to the file.
Now that you have the link, you can proceed to the next step.
2. Create a QR Code
Now you need to go to your QR Code generator. As discussed above, in this article, we will be using Scanova. You just need to follow these steps:
a. Go to Scanova and sign up for a 14-day free trial
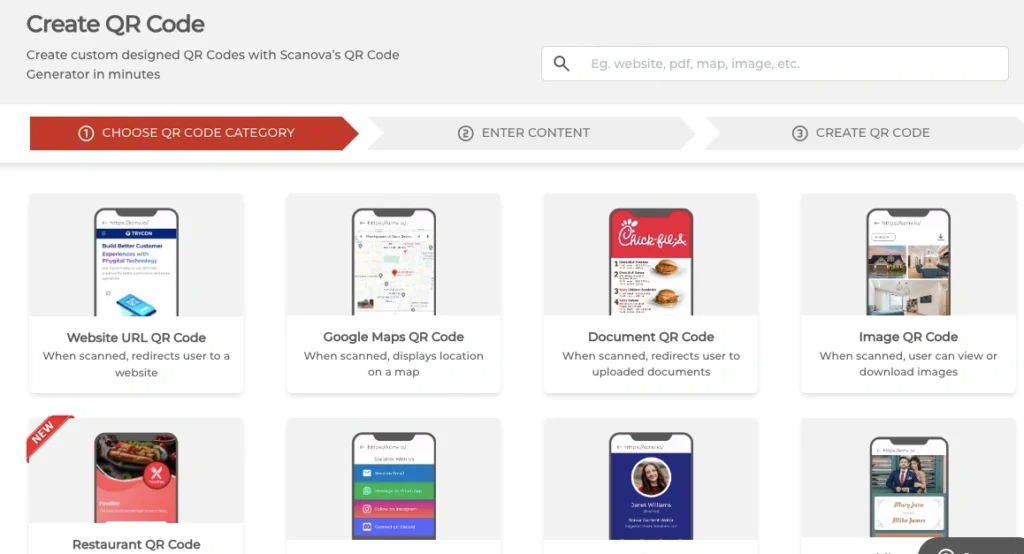
b. From QR Code categories, select the Website URL QR Code
c. On the page that loads, paste the link to your excel file

d. Now, click on Create QR Code
e. A window will pop-up asking you to name and save the QR Code. Enter a suitable name and click Save
f. Next, you will see three QR Code designs on your screen. These are—standard black-and-white, custom with a logo, and custom with a background

You can proceed with either of them. Note that if your use case is marketing or promotional and you want to attract as many scans as possible, you must consider adding a design to your QR Code. It is a fact that customized QR Codes act as point-of-engagement and attract many more scans than black-and-white ones.
g. Once your QR Code is ready, say after you design it, you can go ahead to Update and Download it
h. Again, a window will pop-up asking you to specify the QR Code image size and format. Note that if you want to put up the QR Code on print media creatives, you must export it in vector formats such as SVG and EPS
This is because vectors formats don’t pixelate no matter how much you zoom in or zoom out. This ensures the smooth scannability of the QR Code.
i. Once you specify the details, click Export
Your QR Code image will be exported.
Say you have created the QR Code. And after some time, you want to change the file encoded in it. You can do it if you create a dynamic QR Code. Keep reading to know what it means.
D. How to edit the QR Code
A QR Code can be edited if it is dynamic in nature. That means you can edit its content even after you have created it. No need to create a new QR Code.
This is because dynamic QR Codes are editable. In addition, they are also trackable. Hence, you can also monitor their scanning activity. For example, how many people have scanned the QR Code, where they scanned it from, when did they do it.
Such details are especially helpful if you’re running a marketing campaign. They help you understand your audience better and optimize your campaigns accordingly.
On the other hand, if you create a static QR Code, you cannot edit it. To do it, you will have to create a new QR Code altogether. And static QR Codes are devoid of the tracking feature also.
Now, let’s proceed to see how to edit the QR Code you’ve created for the Excel file. Note that you can do it only if you selected the Dynamic option in the Name and Save window while creating the QR Code.
Here’s how to do it:
1. Login to Scanova
2. From the dashboard, go to Saved QR Codes section

3. Now, open the QR Code you want to make changes to
4. Make whatever changes you want to make (for example changing the encoded URL)
5. Once you make changes, click Update QR Code
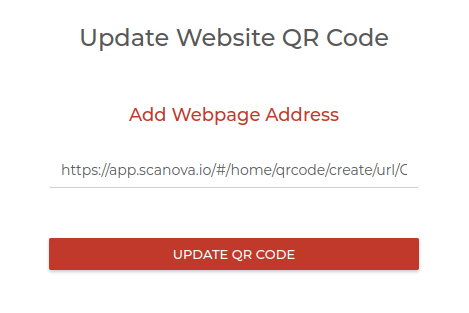
That’s it. Your QR code will be updated. You can test scan it to check if the changes have been updated or not.
You now know everything about QR Code for an Excel file. It helps you share your file easily with your target audience. And they simply need their smartphones to scan the QR Code.
They just need to open the camera or QR Code scanning app on their phones. And hold it in front of the QR Code for a few seconds. A message will pop-up indicating the QR Code has been scanned. That simple.
E. Secure and verify your Excel files with QR Codes
Sharing Excel files through QR Codes is quick and convenient. But in some cases, just sharing isn’t enough; you may also want to make sure the file is authentic and hasn’t been tampered with.
This is where QR Mark can help. It adds a unique QR Code to your document that links to a secure verification page. When scanned, anyone can instantly see details such as the file’s source, issue date, and even the original version. This makes it simple for your audience to trust that the spreadsheet is genuine.
And the best part is, you don’t even have to leave Excel to do it. With the QR Mark add-in (available on Microsoft AppSource), you can directly embed secure QR Codes in your Word, Excel, or PowerPoint files.
So, whether it’s a financial report, business record, or any critical spreadsheet, you can make it not only easy to share but also trusted and verifiable. You can even try QR Mark for free to see how it works.
In case you still have any questions or concerns, let us know in the comments.
{ “@context”: “http://schema.org”, “@type”: “VideoObject”, “name”: “Excel QR Code Generator: Two Easy Ways To Share Spreadsheets”, “description”: “Today, we have something really exciting to share with you – QR Codes in Excel! That’s right, we’ll show you how to generate QR Codes and use them to enhance your Excel spreadsheets. The first is by creating a QR Code that links to an Excel file (via QCG). The second is by generating QR Codes using data in your Excel file. 00:00 – Introduction 01:14 – Create Excel QR Code Using Scanova 03:14 – Excel QR Code in Bulk By QR Batch We will be using Scanova’s QR Code Generator Tool (QCG) to create the Excel QR Code. You just need to follow these steps: Go to Scanova and sign-up for a 14-day free trial. From QR Code categories, select the Website URL QR Code. On the page that loads, paste the link to your Excel file. Now, click on Create QR Code. A window will pop up asking you to name and save the QR Code. Enter a suitable name and click Save. Next, you will see three QR Code designs on your screen. These are—standard black-and-white, custom with a logo, and custom with a background. You can proceed with either of them. Note that if your use case is marketing or promotional and you want to attract as many scans as possible, you must consider adding a design to your QR Code. Once you specify the details, click Export. Your QR Code image will be exported. Now let’s see how to create QR Codes with data present in an Excel sheet. In this case, you’ll have to generate QR Codes in bulk. You’d have a spreadsheet (XLS, XLSX, or CSV) with data in each row for each QR Code. You’d need an online tool where you can upload Excel and generate QR Codes. If this is what you need—you need a bulk QR Code generator tool such as QR Batch. Here is how you can get started. First, format your spreadsheet. To do it, follow these steps: The first column should be the QR Code Filename. The QR Code images that will be generated in a zip folder will have these filenames. The second column should be the content you want to encode. This will depend on the QR Code category you will select. To encode content in Excel, you can choose from the following three categories: First category is Website URL QR Code A Website URL QR Code, when scanned, takes the end-users to visit the encoded website address. Here, the first column should be the Filename (QR Code 1, QR Code 2, etc). While the second column should be the Website URL that will be encoded into the QR Code. Second Category is Plain Text QR Code Plain Text QR Codes store textual information such as an address, product information, or, a short bio. To create a Plain Text QR Code using Excel, the second column should contain the text. While the first column, as usual, should be the Filename. Third Category is VCard QR Code A VCard QR Code, when scanned, displays contact information. These include details such as name, title/designation, company, email, phone, and website. It also prompts the user to ‘Add as contact’. For a VCard QR Code, You can add contact details second column onwards. That is, the name is Column B, title in Column C, the company in Column D, and so on. Now, choose the QR Code category—URL, VCard, or Text—as per requirements. As mentioned earlier, we have selected Website URL QR Code for demo purposes. Next, Upload Spreadsheet. Upload the spreadsheet you created in Step 1 on the page that opens. You can upload it in CSV, XLS, or XLSX format. Now, Review Data. For example, say you want to create Simple Text QR Codes. The ‘Review’ page on which you land will prompt you to confirm the columns. That means you need to select which column is QR Code filename and which column has text. Moving on, Add Design. Once you review the data, you will be landed on a page where you will see three design options: Standard design: It gives generic black-and-white QR Codes Custom Logo Design: It allows you to add a logo and color to your QR Codes Custom Background Design: It helps you add an image as QR Codes’ background If you want a basic black-and-white QR Code, go for the standard QR Code. But if your use case is promotional or customer-facing, choose one of the other two design options. Also, custom QR Codes attract 50-100% more scans than plain black-and-white ones. Next, specify batch name and other details. After you finalize the design of your QR Code, a window will pop up prompting you to specify the batch name. In the same window, you will also get an option to choose how you wish to export the QR Codes. Note that if in the beginning, you had selected Generate QR Code Images as batch, then you’ll have to select the size and format of QR Code images to be generated. On the other hand, if you had selected the Generate QR Code labels option, you’ll see the option to name the batch and choose the label sheet layout. Generating QR Codes in Excel is a fantastic way to make your spreadsheets more interactive and user-friendly. Whether it’s for tracking inventory, creating interactive menus, or sharing information, QR Codes can be a game-changer.”, “thumbnailUrl”: “https://i.ytimg.com/vi/gEg4zliuOS8/default.jpg”, “uploadDate”: “2023-07-28T12:30:31Z”, “duration”: “PT8M34S”, “embedUrl”: “https://www.youtube.com/embed/gEg4zliuOS8”, “interactionCount”: “149” }