Event QR Code
Encode all event-related information like event schedule, venue, RSVP option, and more in a QR Code with Scanova's Event QR Code Generator. Upon scanning this code, a customized event landing page will be displayed.
Create a memorable experience for your guests
Offer quick access to information, minimize printing costs, get valuable insights about your guests, and more
Enhance your events with Scanova's QR Codes for events

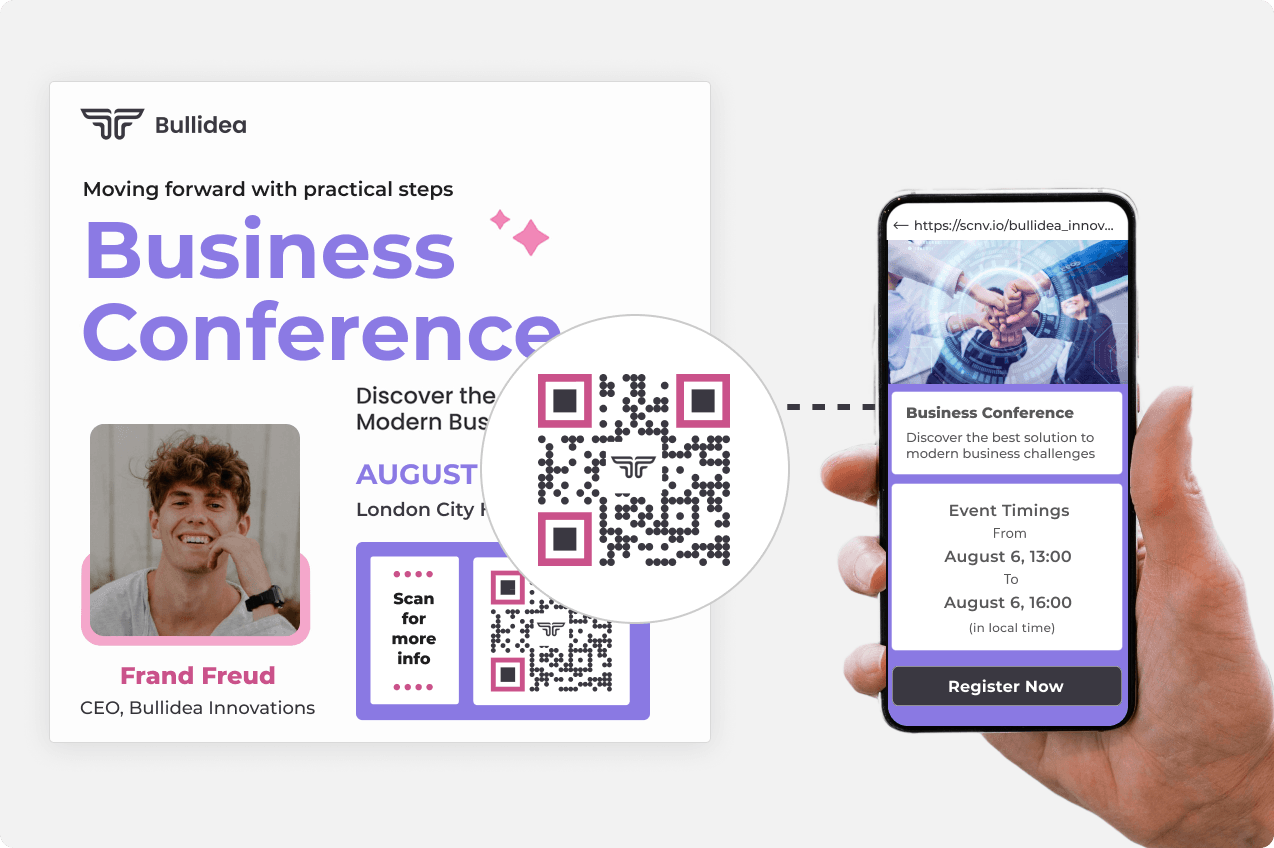
Create & Edit Event Details Easily
Design a personalized landing page with text description, high-quality images, detailed event schedule, comprehensive venue information, contact details, social media widgets, and more. With the ability to edit linked information anytime, you can ensure that attendees always have relevant details.
Design a personalized landing page with text description, high-quality images, detailed event schedule, comprehensive venue information, contact details, social media widgets, and more. With the ability to edit linked information anytime, you can ensure that attendees always have relevant details.
RSVP
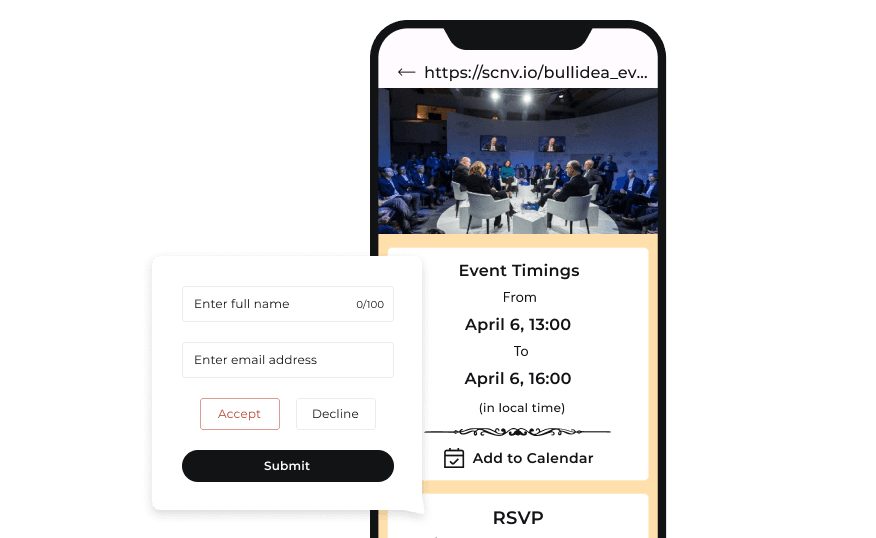
Streamlining event management is crucial for ensuring a smooth and successful experience for both organizers and attendees. Implementing an RSVP feature allows guests to confirm their attendance easily. This functionality helps organizers gauge attendance and plan accordingly.
Streamlining event management is crucial for ensuring a smooth and successful experience for both organizers and attendees. Implementing an RSVP feature allows guests to confirm their attendance easily. This functionality helps organizers gauge attendance and plan accordingly.

Advanced Components
Add advanced components such as custom forms for collecting specific attendee information, custom script , videos, and more to enhance the functionality of your Event QR Codes. These elements enhance engagement and provide a more interactive experience.
Add advanced components such as custom forms for collecting specific attendee information, custom script , videos, and more to enhance the functionality of your Event QR Codes. These elements enhance engagement and provide a more interactive experience.
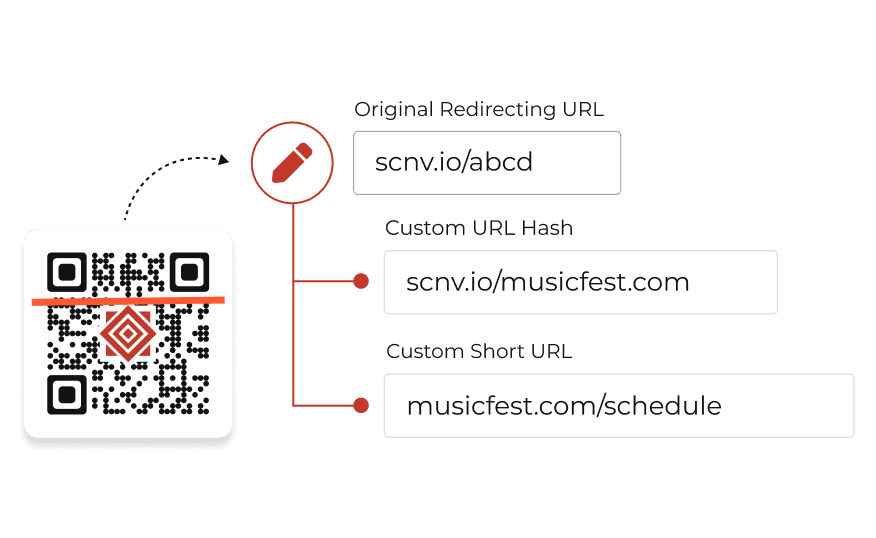
Customize Short URL
Increase brand recognition and trust by using your personalized link (like https://musicfest.com/schedule) instead of standard short URL (like https://scnv.io/abcd). This approach fosters a stronger connection between your brand and the even.
More on Custom Domain
Increase brand recognition and trust by using your personalized link (like https://musicfest.com/schedule) instead of standard short URL (like https://scnv.io/abcd). This approach fosters a stronger connection between your brand and the even.
More on Custom Domain
Analytics
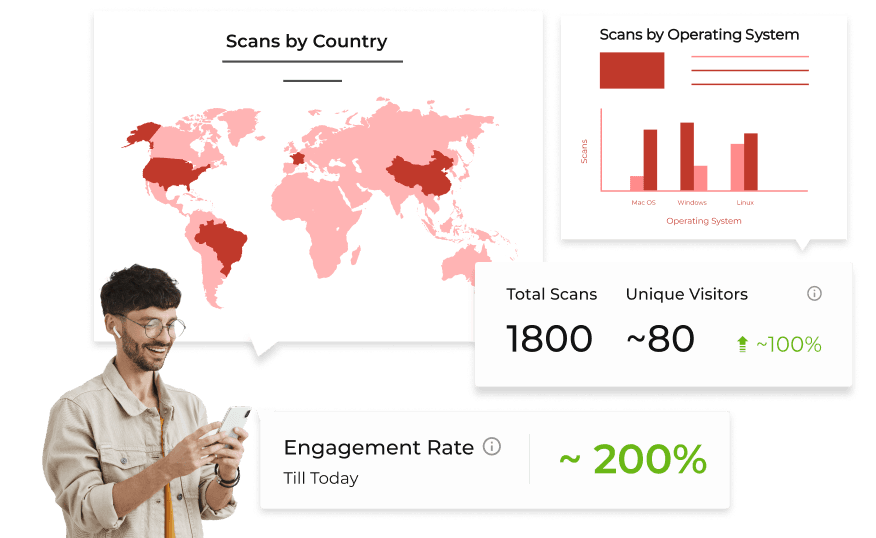
Monitor event performance through analytics. Gathering insights such as scanning device details and exact GPS locations of attendees allows organizers to understand their audience better and tailor future events accordingly. This data-driven approach can improve overall attendee experience.
Monitor event performance through analytics. Gathering insights such as scanning device details and exact GPS locations of attendees allows organizers to understand their audience better and tailor future events accordingly. This data-driven approach can improve overall attendee experience.
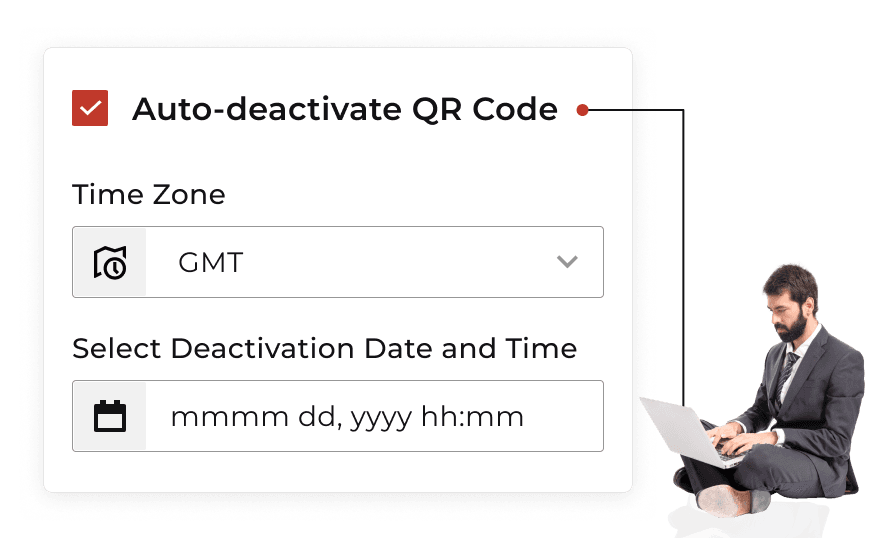
Auto-deactivate QR Code
For events using QR Codes for registration or information access, setting an automatic expiration date is beneficial. By specifying the exact date and time for deactivation, organizers ensure that QR Codes are no longer accessible once the event concludes—simplifying post-event management.
For events using QR Codes for registration or information access, setting an automatic expiration date is beneficial. By specifying the exact date and time for deactivation, organizers ensure that QR Codes are no longer accessible once the event concludes—simplifying post-event management.
Creating Event QR Code
Follow these steps to create an Event QR

Select Category
Log in to Scanova. Go to QR Codes, click on Create QR Code, and opt for Event QR Code category.

Add Content
Add event schedule, event venue, map location, videos, RSVP form, banner images, social media links, and more

Create QR Code
Provide QR Code name and tags (optional). You can enable advanced settings like age restriction and auto-deactivation. Once done, click on Create Page.

Customize & Download
Customize and download the QR Code or test and download it
Top choice of global brands like Amazon, AT&T, Nestle, and Walmart


Benefits of using Event QRs
Enhance attendee engagement, provide instant access to event information, and simplify RSVPing

Seamless Information Access
Attendees can access essential event details, such as schedules and maps, directly through the QR Codes. This centralized information hub enhances convenience and keeps guests informed about the event.
Attendees can access essential event details, such as schedules and maps, directly through the QR Codes. This centralized information hub enhances convenience and keeps guests informed about the event.

Real-time Data Insights
Event QR Codes enable organizers to collect real-time data on the total number of scans, location of scans, and device details. This valuable information helps in making informed decisions to improve future events.
Event QR Codes enable organizers to collect real-time data on the total number of scans, location of scans, and device details. This valuable information helps in making informed decisions to improve future events.

Easy Integration
Event QR Codes can be easily integrated into both print and digital promotional materials. This promotes operational efficiency for organizers—allowing them to place QR Codes on posters, websites, social media etc.
Event QR Codes can be easily integrated into both print and digital promotional materials. This promotes operational efficiency for organizers—allowing them to place QR Codes on posters, websites, social media etc.

Increased Brand Visibility
Custom-designed Event QR Codes enhance brand recognition as the target audience engages with them. QR Codes can be customized using AI-generated design, logo design, frames, brand colors, eye & data patterns, gradients, etc.
Custom-designed Event QR Codes enhance brand recognition as the target audience engages with them. QR Codes can be customized using AI-generated design, logo design, frames, brand colors, eye & data patterns, gradients, etc.

Tracking Attendance Trends
By analyzing RSVP data collected through Event QR Codes, organizers can gain valuable insights into attendance trends over time. This is crucial for effective event planning as well as making informed decisions about future events.
By analyzing RSVP data collected through Event QR Codes, organizers can gain valuable insights into attendance trends over time. This is crucial for effective event planning as well as making informed decisions about future events.

Efficient Lead Generation
Organizers can use QR Codes to capture leads effectively before events by collecting contact information from potential guests who scan them. This feature is particularly useful for networking events and trade shows.
Organizers can use QR Codes to capture leads effectively before events by collecting contact information from potential guests who scan them. This feature is particularly useful for networking events and trade shows.
Leverage Event QR Codes for your use case
As per Scanova's internal data, there has been a 301.51% growth in QR Code creation in the recent years
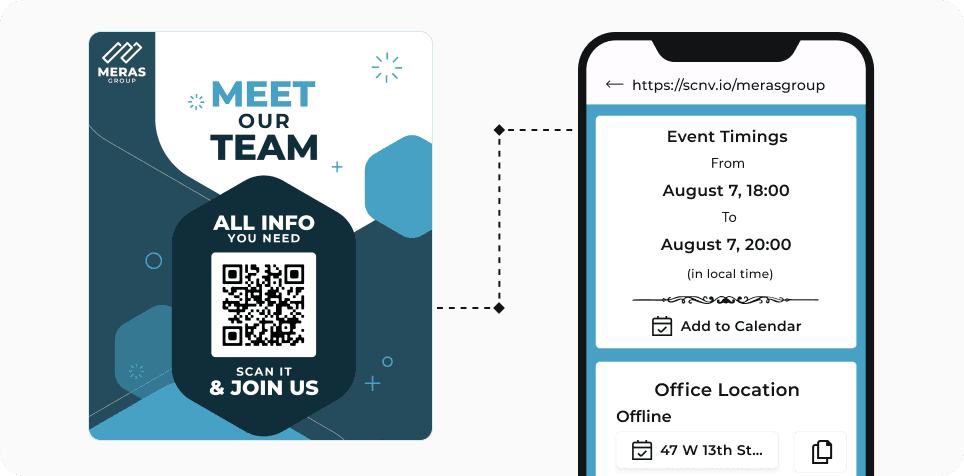
Corporate Events & Conferences
Event QR Codes enhance user experience by providing instant access to event schedules and venue maps. When attendees scan these codes, they are directed to digital resources that outline the event's itinerary—session times, speaker details, locations of various activities, and more.
Event QR Codes enhance user experience by providing instant access to event schedules and venue maps. When attendees scan these codes, they are directed to digital resources that outline the event's itinerary—session times, speaker details, locations of various activities, and more.
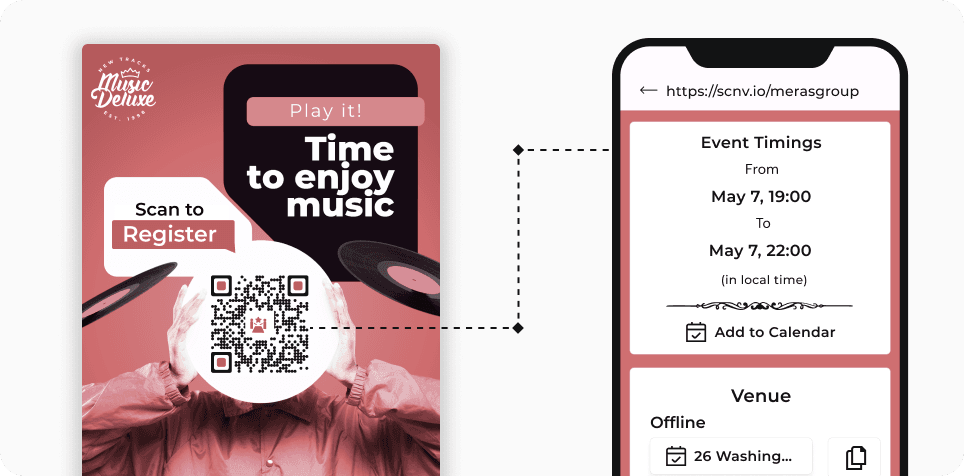
Music Festivals & Concerts
Event QR Codes can be strategically included in promotional materials—such as posters, flyers, website, and social media posts—linking to artist bios, event schedules, venue details, and exclusive content like sneak peeks or behind-the-scenes footage.
Event QR Codes can be strategically included in promotional materials—such as posters, flyers, website, and social media posts—linking to artist bios, event schedules, venue details, and exclusive content like sneak peeks or behind-the-scenes footage.
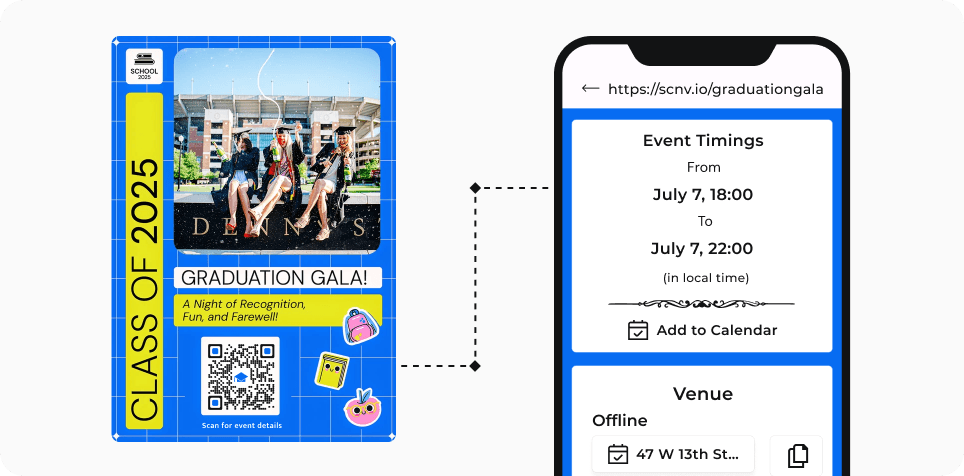
Educational Institutions
Educational institutions employ QR Codes for a variety of events such as educational fairs, seminars, and academic presentations. These codes can be included in invitations or promotional materials, allowing potential attendees to easily access event details.
Educational institutions employ QR Codes for a variety of events such as educational fairs, seminars, and academic presentations. These codes can be included in invitations or promotional materials, allowing potential attendees to easily access event details.
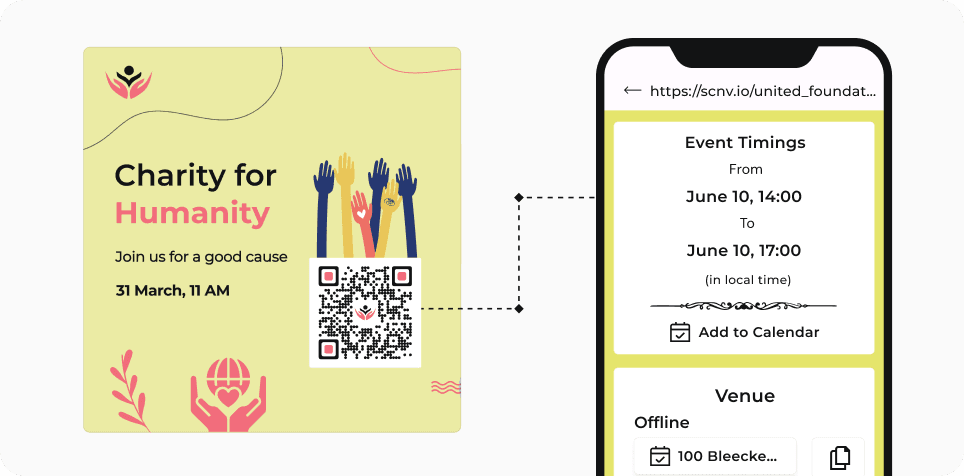
Fundraising Events
Non-profit organizations use QR Codes for fundraising events to enhance donor engagement. These codes can link to information about the event, organization’s mission, initiatives, and more. This helps in raising awareness and encourage support from attendees.
Non-profit organizations use QR Codes for fundraising events to enhance donor engagement. These codes can link to information about the event, organization’s mission, initiatives, and more. This helps in raising awareness and encourage support from attendees.
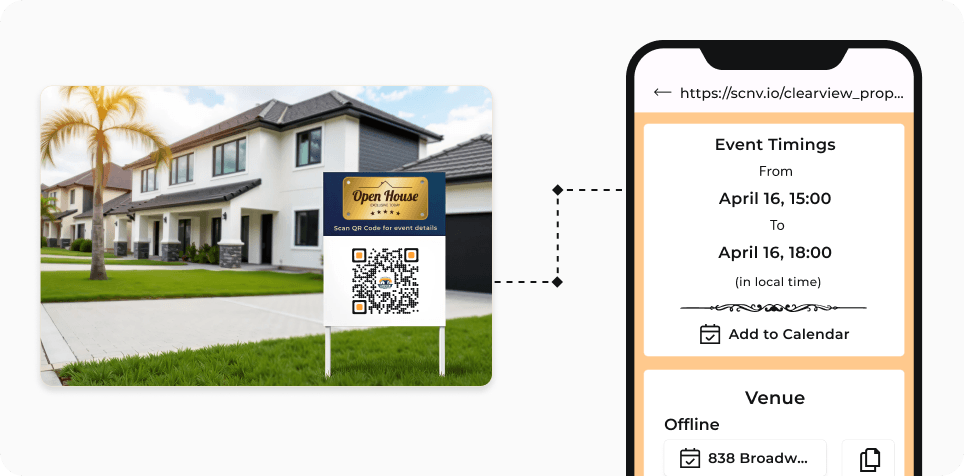
Real Estate Open Houses
Real estate agents can place QR Codes on signage boards that link potential buyers directly to information regarding open house events. This allows interested buyers to attend these events and explore the property while providing agents with valuable data.
Real estate agents can place QR Codes on signage boards that link potential buyers directly to information regarding open house events. This allows interested buyers to attend these events and explore the property while providing agents with valuable data.
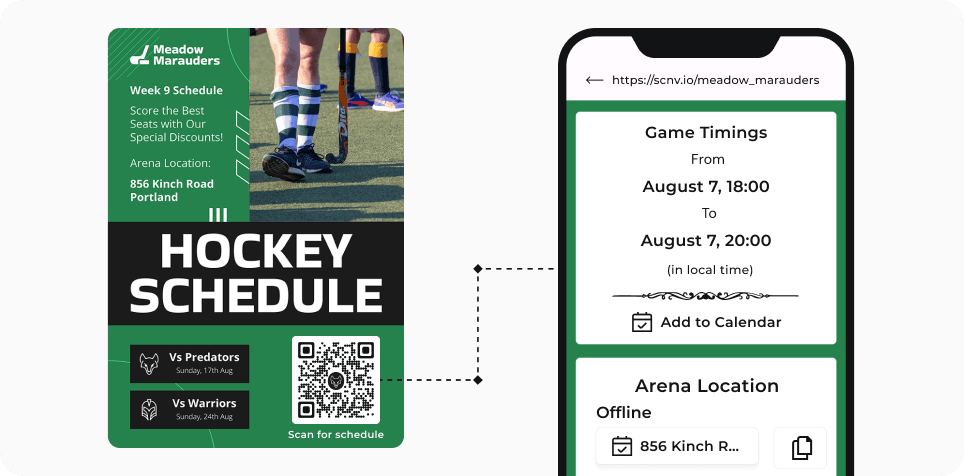
Sports Tournaments
Event QR Codes can be used on promotional materials to provide fans with updates on game schedules, venue details, and more. Fans can scan codes to access interactive content such as exclusive interviews with players, enhancing their engagement with the event.
Event QR Codes can be used on promotional materials to provide fans with updates on game schedules, venue details, and more. Fans can scan codes to access interactive content such as exclusive interviews with players, enhancing their engagement with the event.
Get desired results for your business with Scanova
Best brands in the world trust Scanova QR Code Generator
 Caitlyn DuffyLarge Format Sales District Leader,PepsiCo
“The simplicity of this tool makes it easy for even non-tech users”
Easy to use and achieve successful outcomes with Scanova. The simplicity of this tool makes it easy for even non-tech users. Scanova solves the concern of tracking websites and data sheets efficiently.
 David TaitPerformance Media Lead,Yourtown
“Scanova helps us quickly create QR Codes for multiple uses”
A quick and easy tool for QR Codes. The different QR Code types and features available, including the ability to customize a QR Code based on brand requirements, are impressive. It enables the team to access, manage, create, and download their QR Codes easily. Scanova helps us quickly create QR Codes for multiple uses.
 Daniela GutierrezCDW National Business Leader,Hitachi Vantara
"We have increased our leads by 10x with Scanova"
Scanova has been a wonderful addition to our marketing toolkit. It helps us boost lead generation easily. By introducing Scanova QR Codes in our keynote presentations and booths at conferences, we have increased our leads by 10x. Scanova also makes it easy to customize lead forms, presenting a slick view back to the end user.
 Mojtaba AbediExecutive Director,Finance Maxim Ltd.
“Scanova has proven to be an invaluable tool for our events and projects”
I am quite satisfied with Scanova's services and appreciate their effort in enhancing user experience. Scanova has proven to be an invaluable tool for our events and projects. The ease of use and the range of features have significantly contributed to the success of our initiatives. I particularly appreciate the efficiency of Scanova’s team—always ready to assist.
 Marie ZeccaAdvisory Board Chair,Colorado Women's Lacrosse Officials Association (CWLOA)
“Scanova allows us to gauge interest in multiple distribution areas”
We love that Scanova provides us with demographics/location information when we use their QR Codes in a magazine ad. This allows us to gauge interest in multiple distribution areas. Scanova allows us to access data that we can directly correlate with other analytics we have to help deliver customers with a more accurate ROI on the service.
 Muthaian PrakashDirector—Digital Technology and Solutions,Olam Information Services Private Limited
“The tool has easy-to-use templates for quick implementation”
A perfect QR Code Generator for Dynamic QR Codes. The best part of Scanova is its useful options to generate Dynamic QR Codes with brand identity by adding logos, brand colors, and more. Also, the tool has easy-to-use templates for quick implementation. We have printed Dynamic QR Codes in our consumer package products in the healthy snacks category.
 Brian MarshVP Operations,I DJ NOW
“I highly recommend Scanova”
We use Scanova for our brochures and catalogs as the pricing keeps changing. It’s terrific to send our clients to our website with an easy scan. We have also used Scanova on marketing postcards and backdrops for our booth at trade shows. We love looking at the analytics reports to see how many users visited our site or a webpage. I highly recommend Scanova.
Your security and privacy are important to us
Enjoy unparalleled data protection with ISO/IEC 27001:2022, GDPR, and SOC2 standards


Frequently Asked Questions
Get answers to popular questions about Event QR Codes
Why should I opt for Event QR Codes?
Streamline event management and share details easily with Event QR Codes. Redirect guests to view event information—such as venue location, event description, RSVP option, and more—with just a scan.
Can I create Event QR Codes in my free trial?
Yes, you can create Event QR Codes in your free trial. Note: Event QR Codes are dynamic and will stop working after your free trial. An ongoing subscription with Scanova will be required for these QR Codes to work.
How can I get the RSVP data?
You can get the RSVP data for your Event QR Code from My QR Codes > Select QR Code > View/Edit QR Code > Download Data
What will happen to my Event QR Codes after the 14-day free trial?
Event QR Codes are dynamic and will stop working once your free trial is over. An ongoing subscription with Scanova will be needed to keep these QR Codes active.
Get started with Scanova
Create QR Codes as per your need with ease