Calendly QR Code: All You Need To Know

In a nutshell (TL;DR): A Calendly QR Code is a scannable image. Point a phone camera at it, and it opens your booking page right away. You can make one in two ways. Use Calendly’s built-in QR feature inside its mobile app. Or use a third-party QR Code generator that turns your booking link into a code. The app version is quick but static, mobile-only, and gives you no scan data. A dynamic QR Code is the better choice for anything you print or reuse. You can edit the destination later and see how many people actually scan it. Below, I walk through both methods, where to place your code, and how to track results.
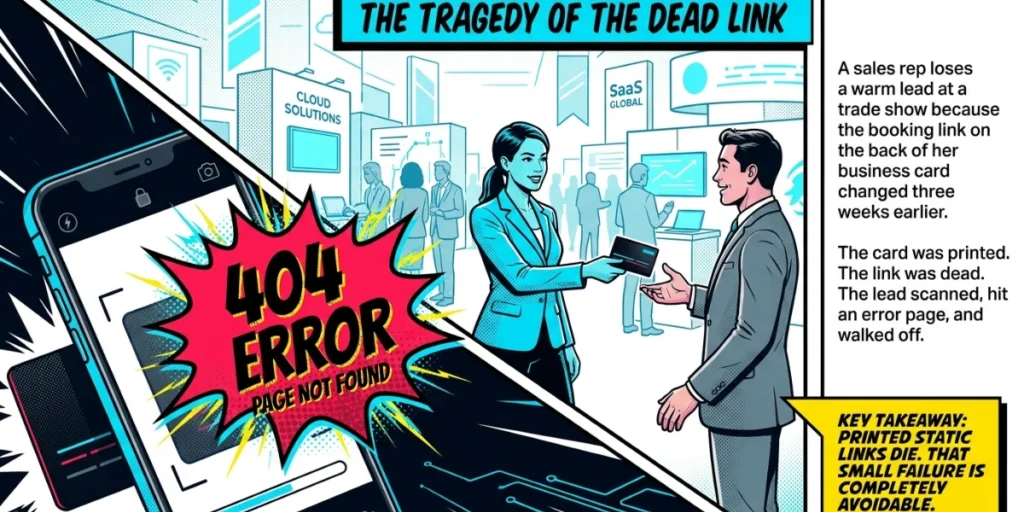
I have watched a sales rep lose a warm lead at a trade show because the booking link on the back of her business card had changed three weeks earlier. The card was printed. The link was dead. The lead scanned, hit an error page, and walked off. That small failure is avoidable, and it is exactly why this guide exists.
QR Codes are not a pandemic leftover. They are now part of how people expect to act on something in the real world. According to Statista, the number of U.S. smartphone users scanning QR Codes was projected to pass 100 million in 2025, up from around 83.4 million in 2022.
Calendly is just as widely used for scheduling. Put the two together, and you remove the slowest part of booking a meeting: typing a link.
This article covers the essentials. I explain what a Calendly QR Code is and whether Calendly has one built in. I cover the difference between static and dynamic code. Then I walk through how to create one, where to place it, and how to track scans.
By the end, you will be able to set up a code that keeps working long after the conversation that started it.
A. What is a Calendly QR Code?
A Calendly QR Code is a scannable square that links directly to your Calendly booking page or to a specific event type. When someone scans it with their phone camera, their browser opens your scheduling page. They then pick an available time, with no typing or searching.
Think of it as the in-person version of sharing your booking link. Sending a link works well via email or chat, where the other person can click it.
A QR Code solves the harder moment: you are standing in front of someone, time is short, and you want them booked before you both move on.
As Calendly notes in its own guide, a code is the quickest way to share a booking page and schedule a meeting on the spot when you meet someone face-to-face.
The code itself contains only one thing: your Calendly URL. That simplicity is its strength. It works on any modern phone, on iOS and Android, with no app required on the scanner’s side.
B. Does Calendly have a built-in QR Code feature?
Yes, but with real limits worth understanding before you rely on it.
Calendly offers QR Code generation inside its mobile app. Open the app, go to your event types, select the event you want, tap the share option, and choose QR Code. You can show it on your screen for someone to scan right then, or save it to your photo gallery so it is ready even with a poor signal.
This option is available only in the app. You cannot generate it from the Calendly website.
The built-in code is genuinely useful for live, in-person moments. But it has three constraints that matter:
- It is static. The code is locked to the link it was made from. If your Calendly URL ever changes, the printed code stops working, exactly the failure I described above.
- It is mobile-only. You cannot make one at your desk while building a deck, a flyer, or an email signature.
- It gives you no scan data. Calendly does not track QR Code scans, so you cannot see how many people scanned, when, or from which placement.
For a quick screen-to-screen share, the app code is fine. For anything that lives on paper, on a slide, or in a signature for months, you will want more control. That is where a dedicated QR Code generator comes in.
C. Static vs dynamic QR Codes: which should you use for Calendly?
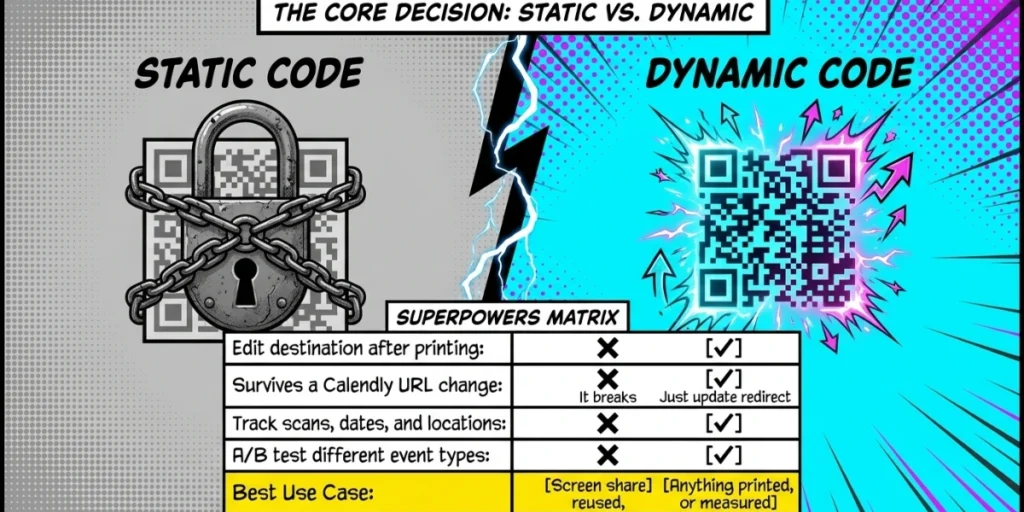
This is the single most important decision in this whole process, and most guides skip past it. A static code can quietly die. A dynamic one you can fix and measure. That is the whole difference.
A static QR Code encodes your link permanently. It is fine for a one-off, throwaway use where you will never need to change the destination or count scans. The Calendly app code is static.
A dynamic QR Code stores a short redirect URL instead of your raw link. So you can change the actual destination at any time without reprinting. It also records each scan, which is how you get analytics.
Here is how the two compare for a Calendly use case:
|
Feature |
Static QR Code |
Dynamic QR Code |
|
Edit the destination after printing |
No |
Yes |
|
Survives a Calendly URL change |
No, it breaks |
Yes, just update the redirect |
|
Track scans, dates, and locations |
No |
Yes |
|
A/B test different event types |
No |
Yes |
|
Best for |
A quick one-time screen share |
Anything printed, reused, or measured |
Here is the rule I follow. If the code will ever touch print, a slide, a signature, or a campaign you want to learn from, make it dynamic.
Industry data backs up why dynamic has become the default for business use. Dynamic codes now make up the majority of commercial QR codes.
They hold roughly 60-70% of the market, according to a 2026 statistics roundup from sources such as Statista and Mordor Intelligence.
This is the gap where a platform like ours fits. At Scanova, our Dynamic QR Codes let you point one printed code at any Calendly event. You can then change that destination later without reprinting.
D. How to create a Calendly QR Code (step by step)
There are two routes. Pick based on the decision above.
Method 1: Using Calendly’s mobile app (static, quick)
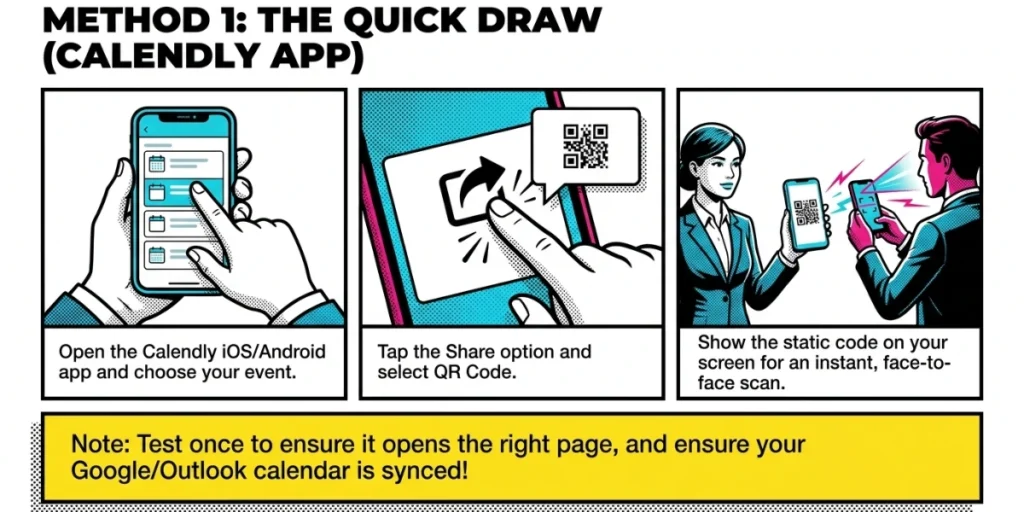
Use this when you just need to show a code on your screen for someone to scan in the moment.
- Open the Calendly mobile app on your phone, available for iOS and Android.
- Tap the Event Types tab.
- Choose the event you want a code for, such as a 30-minute intro call.
- Tap the Share option for that event.
- Select QR Code from the sharing choices.
- Show the code on screen, or save it to your photo gallery for offline access.
Before any event, connect your Google, Outlook, or Apple calendar first so your availability is correct. Then test the code once to make sure it opens the right page.
Method 2: Using Scanova QR Code generator (dynamic, trackable)
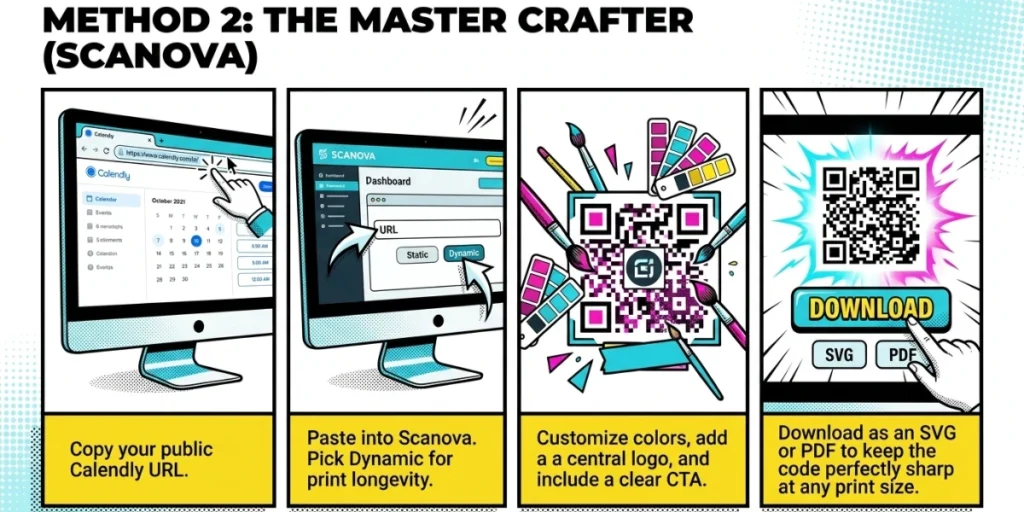
- Sign in to Calendly and select the event type you want people to schedule, such as a discovery call or demo. Click Share, then copy the booking link. Make sure it is a public, shareable Calendly URL before you move on, since a private or unpublished link will not work for everyone who scans.
- Open your browser, visit scanova.io, and sign up with your email or Google account to start the 14-day free trial. An account lets you make a Dynamic QR Code you can edit and track later.
- From the list of QR Code types, choose Website URL. A Calendly booking page is just a web link, so this is the right pick.
- Paste your Calendly link into the URL field, then name the code something like “Book a Meeting” so you can find it later in your dashboard.
- Pick Dynamic for anything printed. It lets you change the destination link later without reprinting, so if you switch event types or update your Calendly, the same code still works. It also shows you scan data, such as how many people scanned, where, and when.
- Open Edit Design to add your colors, a center logo through Custom Logo Design, or a backdrop through Custom Background Design. Add a short call to action near the code, like “Scan to book a meeting,” so people know what to expect.
- Scan with one Android and one iPhone to confirm your Calendly page opens on both. Phones behave differently, so test every time before you print.
- Use SVG or PDF for high-quality print like business cards and brochures, so the code stays sharp at any size. Then put it where people will easily see it.
- Share it where people will see it. Add it to your email signature, business cards, slides, signage, or printed handouts so anyone can scan to book a meeting with you.
“A dynamic QR Code gives you the flexibility to update schedules without reprinting, while scan tracking helps you understand whether people are actually accessing the latest information. For recurring events or changing timetables, it’s worth testing different QR Code placements and call-to-actions to see what drives the most scans.” — Siddharth Pangtey, Product Manager at Scanova
E. Where should you place your Calendly QR Code?
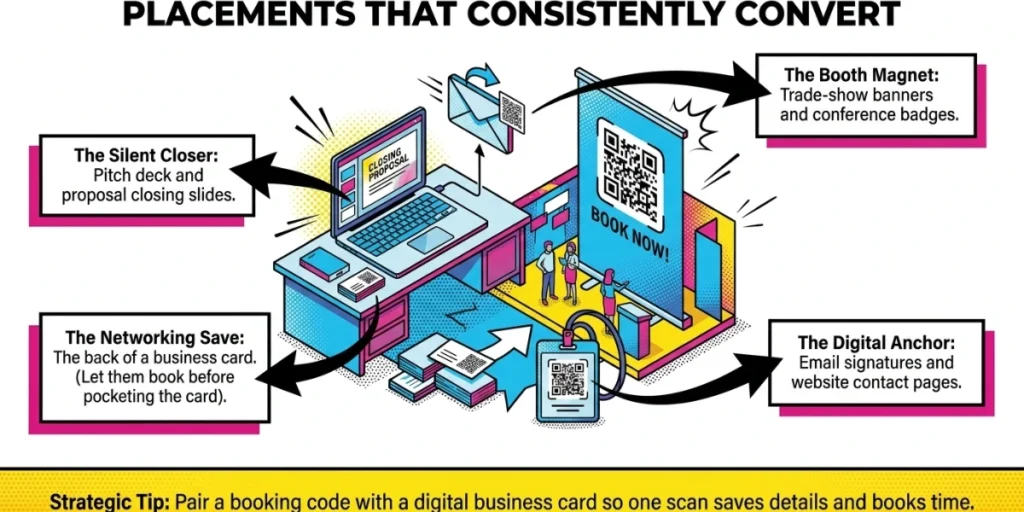
A code only works if it’s where the right person can scan it at the right moment. Here are the placements that consistently earn bookings, drawn from how sales, recruiting, and service teams actually use them.
- Business cards. Put the code on the back so a new contact can book a follow-up before they even pocket the card. This is the classic networking save.
- Email signature. Every email you send is an opportunity to book. A small “scan to schedule” code beside your name works for recipients reading on a second device.
- Pitch decks and proposals. Drop the code on your closing slide or the last page of a proposal so an interested reader can book a next step without leaving the document.
- Trade-show and booth signage. A large code on a banner lets a qualified lead book a demo while their interest is high. Sales teams use this to schedule walkthroughs on the spot.
- Conference badges and name tags. A code on your badge turns a hallway chat into a booked one-on-one.
- Website contact or sales page. A “scan to book a call” code gives mobile visitors a fast path to your calendar, boosting booking rates.
- Printed flyers, brochures, and posters. Useful in waiting areas, clinics, and events where people have a moment to act.
Match the code to the goal. A consultant might use one code for a paid strategy session. A recruiter might use a separate code for candidate screening calls.
A sales team might run a “30-minute discovery” code and a “60-minute demo” code side by side. Different codes for different event types keep your scheduling organized and your data clean.
A useful pattern I see work well: pair the booking code with a digital business card. From one scan, a contact can save your details and book a time.
F. How do you track and optimize your Calendly QR Code?
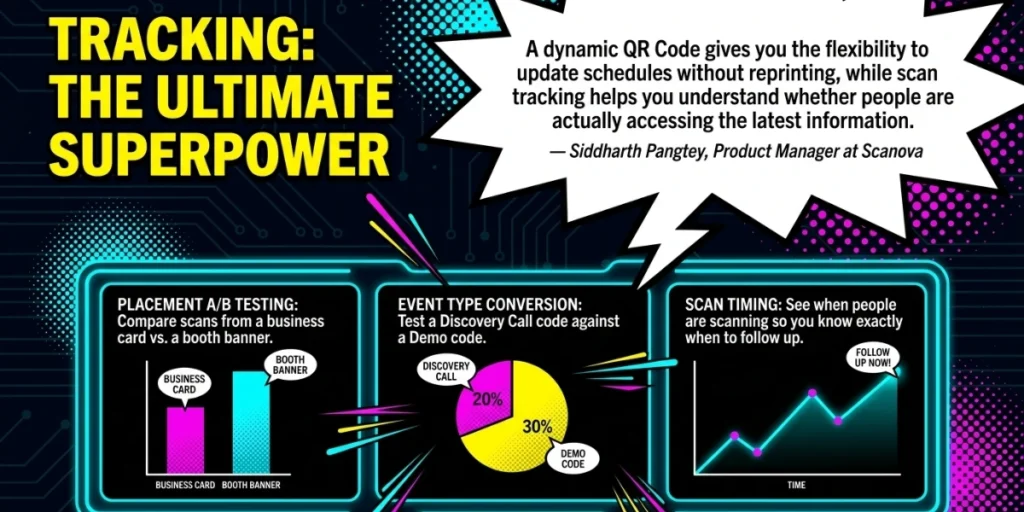
Tracking is the reason to go dynamic, so use it. Because Calendly itself does not record QR scans, your scan analytics come from the generator that made the code. A dynamic code can show you how many scans it received, when they occurred, and roughly where they occurred.
That data answers questions a static code never can:
- Which placement works? Run a different dynamic code on your business card and on your booth banner. Then compare scans to see where your audience actually engages.
- Which event type converts? Test a “discovery call” code against a “demo” code and let the numbers tell you what your audience prefers.
- When are people scanning? Timing patterns tell you when to be ready to follow up fast.
One small habit protects every code you deploy. Keep your availability up to date before you share a code. And re-test the destination whenever you change anything in Calendly. With a dynamic code, you can simply update the redirect; with a static code, you would have to reprint.
At Scanova, our analytics show scan counts and trends for each dynamic code, so you can compare placements and event types instead of guessing.
G. Common mistakes to avoid
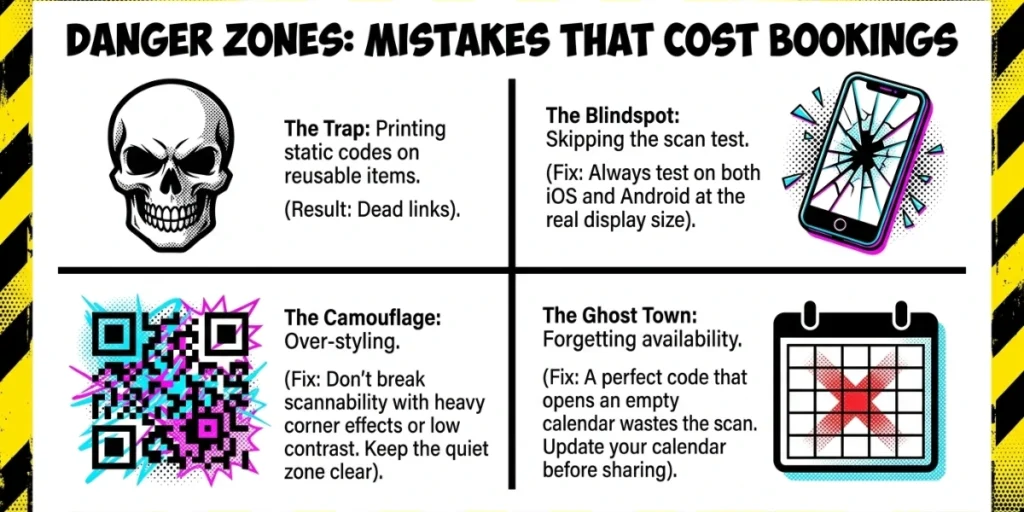
A few errors quietly cost bookings. None is hard to fix.
- Printing a static code on anything reusable. If the Calendly link changes, the code dies. Use dynamic for print.
- Skipping the scan test. Always test on both iOS and Android at the real display size. A code that scans on your desk may fail on a poster.
- Over-styling the code. Heavy effects on the corners or too little contrast break scannability. Keep the quiet zone clear and contrast strong.
- No call to action. A bare code gets ignored. “Scan to book a meeting” tells people what happens next.
- One code for everything. If you cannot tell which placement or event drove a booking, you cannot improve. Use separate codes.
- Forgetting availability. A perfect code that opens an empty calendar wastes the scan. Update availability before you share.
H. FAQ
1. Does Calendly have a QR Code feature?
Yes. Calendly can generate a QR Code inside its mobile app for a chosen event type. It is static, mobile-only, and does not track scans, so for printed or measured uses, a dynamic QR Code generator gives you more control.
2. Can I create a Calendly QR Code on a desktop?
Not through Calendly itself, since its built-in QR feature lives only in the mobile app. To make one on a desktop, copy your Calendly booking link and paste it into a QR Code generator. There, you can also make it dynamic and trackable.
3. Will my QR Code stop working if I change my Calendly link?
Static code will break because it is locked to the original link, and you’ll need to create a new one. A dynamic code keeps working; you simply update the destination behind it without reprinting.
4. Can I track how many people scan my Calendly QR Code?
Not with Calendly’s own code, since Calendly does not track QR scans. A dynamic QR Code generated by a QR Code generator records scan counts, timing, and location, which is how you measure and compare placements.
5. What is the best QR Code type for a Calendly link?
A dynamic URL or website QR Code. It points straight to your booking page and lets you edit the destination and track scans later.
6. Can I add my logo and brand colors to a Calendly QR Code?
Yes, most generators let you customize colors, add a logo, and adjust the design. Keep a strong contrast and a clear, quiet zone so the code stays easy to scan.
Conclusion
A Calendly QR Code removes the smallest, most common friction point in booking a meeting: the moment someone has to find and type your link. Calendly’s in-app code is perfect for a quick face-to-face share.
For everything that lives on paper, on a slide, or in a signature, go dynamic. That version keeps working, and it tells you what is working.
If you want a code you can brand, edit after printing, and measure, our Dynamic QR Codes are built for exactly that.